Thursday, November 19, 2009

A Very Easy Alteration for a Spaghetti Strap Dress


This is probably the fastest, easiest alteration so far.

The dress had pretty, sparkly spaghetti straps. It seemed a shame to cover them up, so I added wide straps to the outside of the original spaghetti straps, keeping the spaghetti straps on top. Here is how I did it.

1. Cut a 4" strip off the underlayer of the dress's skirt and finished the raw (cut) edge.

2. Laid the strip over the shoulder right at the outside of the strap, putting the commercially-finished edge to the outside (exact thread and stitch match).

3. Marked the angle of the dress on the strap in the front and the back, using tailor's chalk.

4. Cut the strap along the markings, about 1" below them.

5. Serged both edges to finish.

6. Gathered the front edge.

7. Pinned the strap to the dress (draping it over the shoulder) and carefully hand-stitched in place in along the front, back, and the strap.

I was really pleased with how it turned out, but I have one concern: I'm afraid this dress is going to gap in the front, between the straps. If it does, I'm going to hand-stitch some bracelet elastic along the lining on the inside, to make it hug the body, instead of gapping forward.


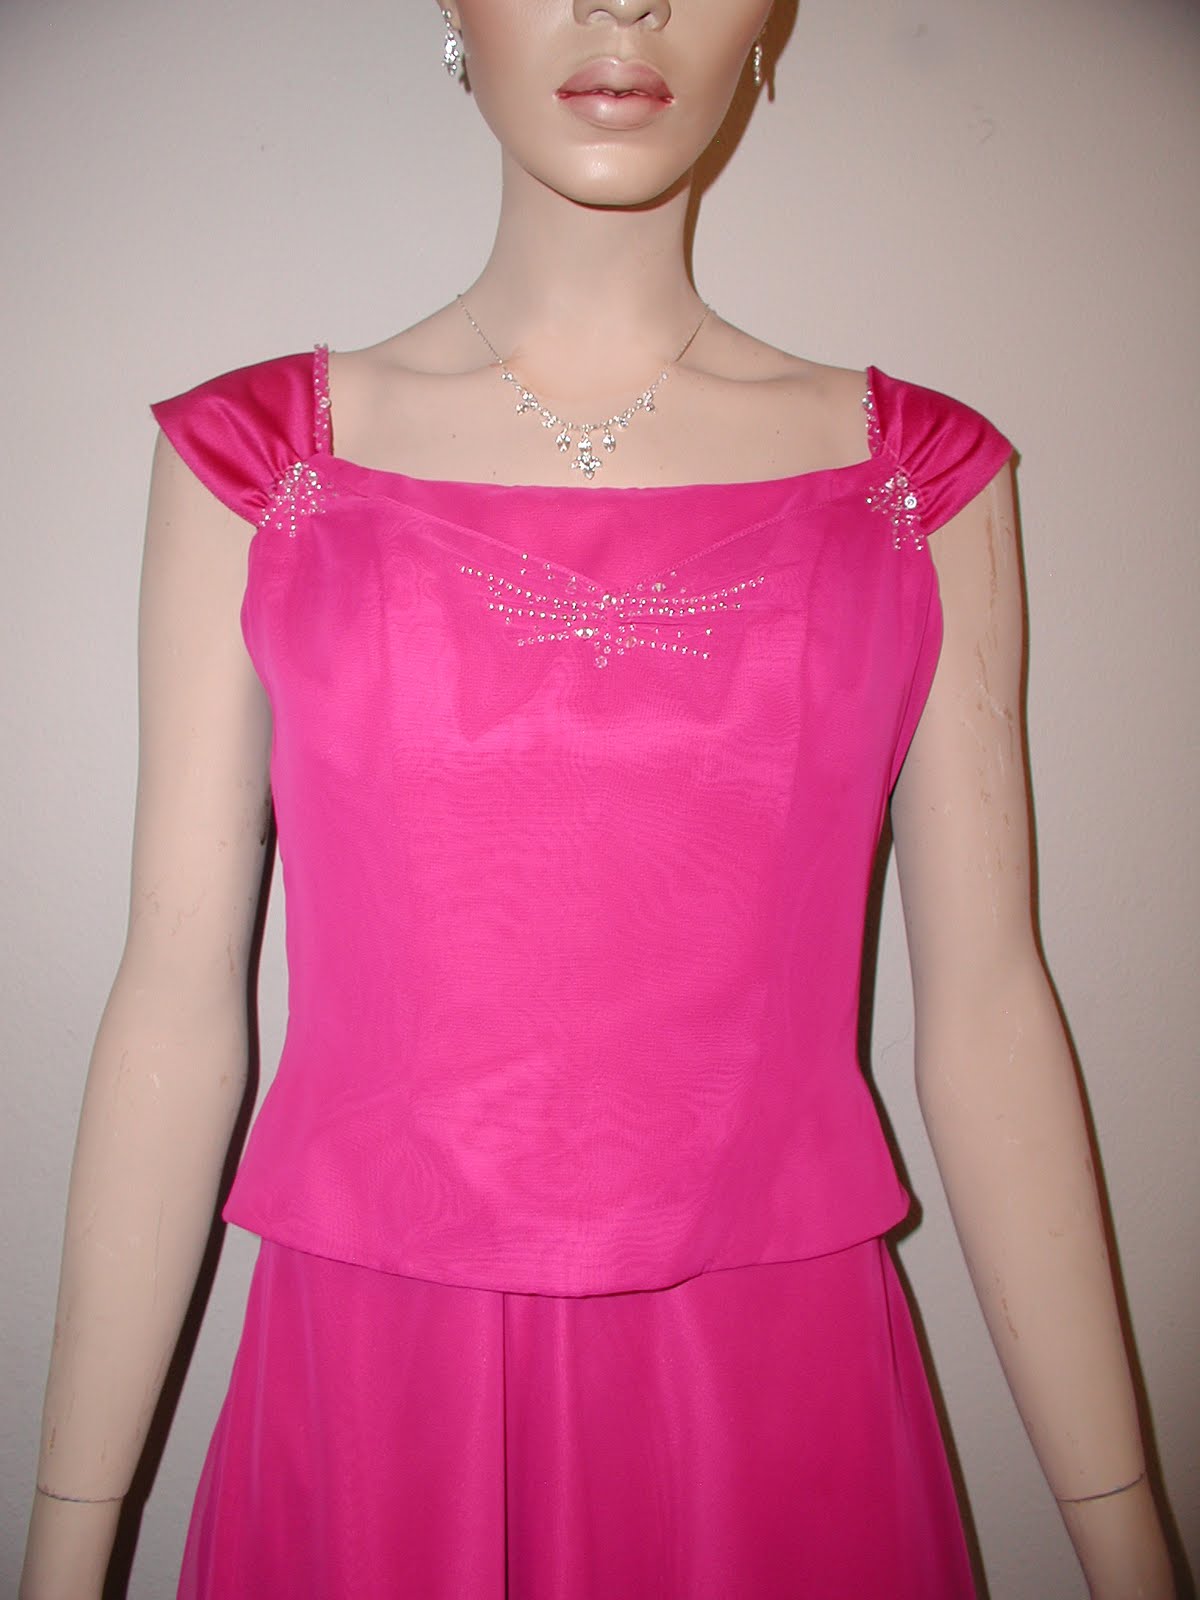
One good thing about this alteration: I took the material off the lining of the skirt. The sheer overlayer stayed the original length. So I didn't have to "shorten" the dress at all. (You can tell the lining has been shortened if you know to look - you can see it a little in the picture - but otherwise, I don't think it would be obvious.)

Wednesday, November 4, 2009

Yet Another 15-Minute Bolero


As I've said before, the black bolero isn't the most sophisticated design option for a makeover. But it is quick, easy, and inexpensive - and it works better when there's some black on the dress, like this one.


Sparkly 15-Minute Bolero


The photos don't show it very well, but this 15-minute Bolero has a swirling sparkle pattern that shines with a blue cast. It looked good on this pretty blue dress, which also features a lot of sparkles, both on the bodice and throughout the skirt.

Tuesday, November 3, 2009

15-minute Bolero


The black stretch velvet bolero isn't the most sophisticated fix design-wise. But this bolero (my own pattern, drafted off a commercial pattern - the same one discussed in a previous post) took me literally 15 minutes to make. It has one piece. You cut it out and sew the shoulder seams, that's it. (I didn't even finish the edges.) For this bolero, I extended the front and the shoulders even a bit more than in the pattern discussed in the previous post, and I like it better. This bolero takes 1/3 yard of material (1/2 if you want to be safe), so it costs about $5 to make. If you need a quick, inexpensive, easy solution, this bolero is it.


The way you detail an outfit can make a big difference in the overall look. Here I put simple rhinestone jewelry on the model, to reflect the line of simple rhinestones on the bodice of the dress.


If you want a little more bling, that works too.


Dress to Tea Length, Coordinating Bolero

Remember from the last post, that I bought two identical dresses and cut one to tea length. Here is the fix for the second dress, which is still full length. (I did it using the fabric from the first dress's slip.)


Basically, I was able to use the third layer of fabric from the skirt of the first dress, a heavy solid navy blue satin, to sew a coordinating bolero for the second dress. I think it works because it is an exact match to the blue satin at the waist of the dress. The pattern is one I drafted from a commercial pattern. The good thing about it is, although it does want to fall to the side like all boleros, the design line at the front will still provide great coverage.


Dress to Tea Length, Matching Fill-In


The main reason why I got this dress was because of the unique fabric. But it was a standard strapless dress.


I knew that the fabric would be impossible to match and difficult to coordinate, so I bought two identical dresses.

I trimmed 13" off the bottom of one of the dresses, making it tea length. This was kind of complicated, because the dress had three layers of fabric: the outer shiny print, a layer under that, and a heavy satin slip.

I used the two top layers to make an insert that matched the dress exactly, using a piece adapted from a commercial pattern as my guide. I cut a layer from the top fabric and a layer from the lining fabric, sewed them together on all sides but the two straight sides, turned it inside out, and pressed it. Then I serged the two straight edges to finish them, draped the insert in place, and then stitched it down by hand to fill in the bodice. (Notice the fun gray and white pearl strings, a perfect fit for this dress!)


Easiest Bolero Ever!


Here is the easiest bolero you'll ever sew: cut one piece, sew two seams. I made it out of stretch velvet, so I didn't even have to finish the edges. (Although I know they're trendy, I am not a big fan of unfinished edges. But in this case, they worked.) The picture is picking up the texture a bit much, making the bolero look a little brown, but in real life, it is a solid midnight black.

I drafted the pattern for this bolero off of a standard commercial bolero pattern. It was very simple to do. Here are pictures:


Basically:
1. Overlap the side seam by the seam allowance.
2. Add 1" to the shoulder seam, curve it down about 1/2" on the end.
3. Raise the underarm by about 1/2".
4. Redraw the armhole.
5. I reshaped the front.
6. To sew: just sew the shoulder seams.

Monday, November 2, 2009

Black Shiny Shrug with Set in Sleeves


For this makeover, I simply sewed a bolero using Butterick B4731, view B (I purchased this pattern just a few days ago.) I sewed the bolero according to the pattern, except I extended the curve out on the bolero front.

Boleros, especially cropped boleros, naturally want to fall to the side. They have an inherent design issue in that they want to fall back just a little too much, such that they might show a bra strap right about the point where they hit the top of the dress. There are a couple of things to help here: first, make sure the dress has straps so you can pull it up high enough and it doesn't want to sink down; second, exend the front curve of the bolero in a bit, if you are sewing; third, simply safety pin the bolero to the dress in the front on each side.

The challenge with every makeover is finding cloth. I couldn't find an exact match to this dress, so I decided to use a contrast. I picked the black satin for its shine, because the dress also has a shine. Using rhinestone jewelry that is compatible with the rhinestone detail on the bodice helps to coordinate the whole and make it look more pulled-together.

Here are a few more views: